This step-by-step guide is meant to help projects better understand onXRP’s launchpad procedure. If there are any questions left unanswered after reading this guide, do not hesitate to contact us on our social channels.
The onXRP launchpad is a comprehensive platform that allows projects to launch their NFT collections through two methods: random mint or non-random mint.
Random Mint – An individual mints an NFT using XRP, OXP, or a custom IOU token in exchange for a random NFT of a collection. This method is generally preferred by larger collections that have been created with a rarity distribution backed by metadata.
Non-random Mint – This is when the complete collection of an NFT project is visible to the entire community and offered for the same minting price. In this case, buyers can choose which NFT they would like to purchase rather than minting one at random. This method of minting is more suitable for smaller collections of unique artworks: paintings, photographs, music, or other collectible art.
To appear on the onXRP NFT launchpad you must apply to become a curated project. In order to do this, you must fill in the launchpad application form. Once this step has been completed and reviewed by the onXRP team, you will be contacted for further collaboration. It is, however, recommended that you apply well before the desired launch date of your project so that the team has enough time to go over the application.
Step for Step Launchpad Application Process
Before starting the application, make sure you connect to the Launchpad using a clean wallet. The wallet you use will become the issuer wallet for the entire collection, so it is therefore important that:
Nobody else but the owner has the keys to this wallet.
The wallet contains an amount of XRP to be locked as treasury and unlocked during minting (ask the onXRP team how much is necessary for your project).
The wallet has never issued an NFT before.
If you are planning to receive IOU tokens for your NFTs, make sure that your issuer wallet has a trust line set up with the IOU token. If you are planning to receive OXP, make sure there is a trust line with OXP set up.
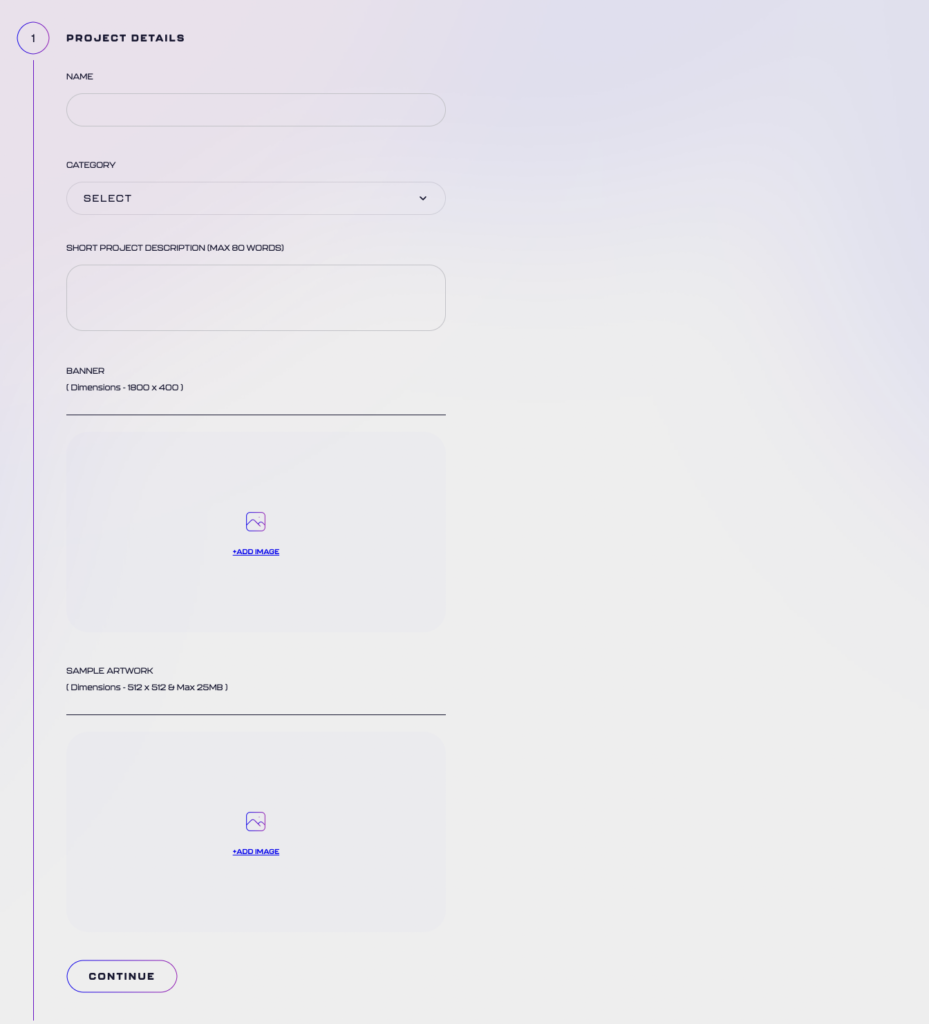
Step 1: Project Details
The information you provide in this step will appear on your ‘Collection Page’, ‘Collection Card’, and ‘Launchpad Page’ so make sure that you take great care of how you input the data.
Fields:
Name – The name of you project.
Category – The category you wish you project to fall under.
Short Project Description – A description that will be visible on your ‘Collection Page’, ‘Collection Card’, and ‘Launchpad Page’.
Banner – A banner that will be displayed on your ‘Collection Page’, ‘Collection Card’, and ‘Launchpad Page’.
Sample Artwork – A picture that will be displayed on your ‘Collection Page’, ‘Collection Card’, and ‘Launchpad Page’.
Press ‘Continue’ if you are confident you have filled in the information correctly.
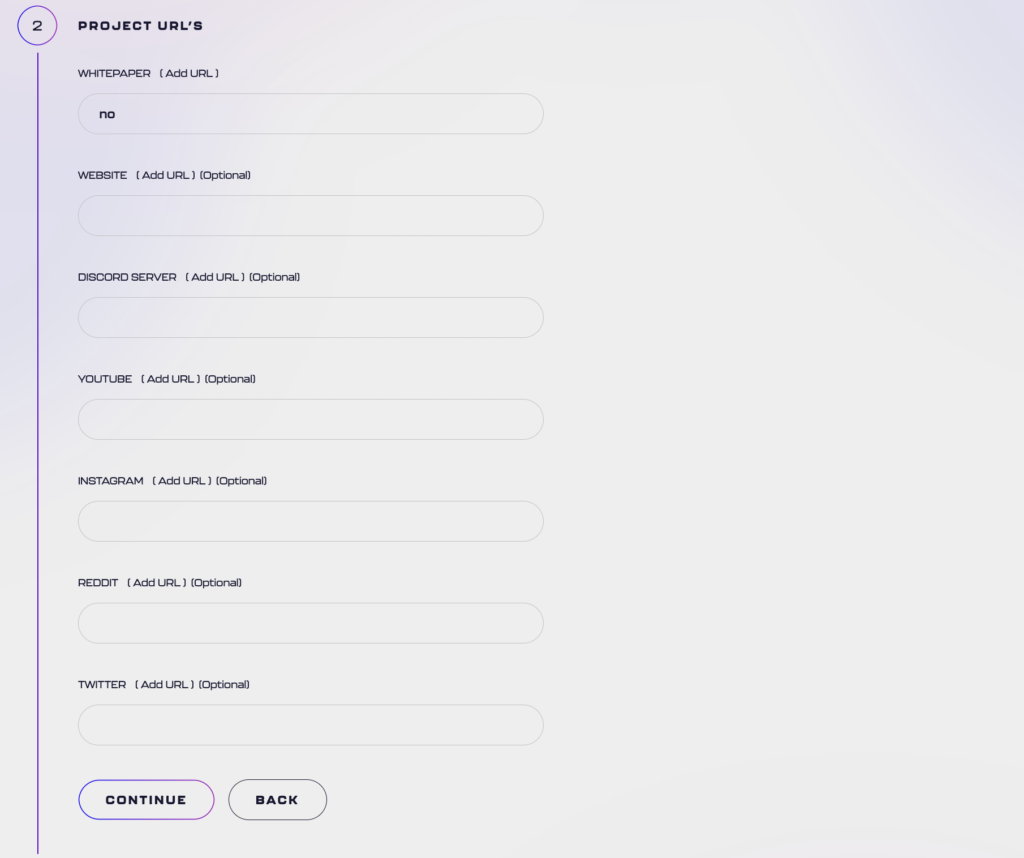
Step 2: Project URLs
Fields:
Add the appropriate URL links into all the input fields.
Press ‘Continue’ if you are confident you have filled in the information correctly.
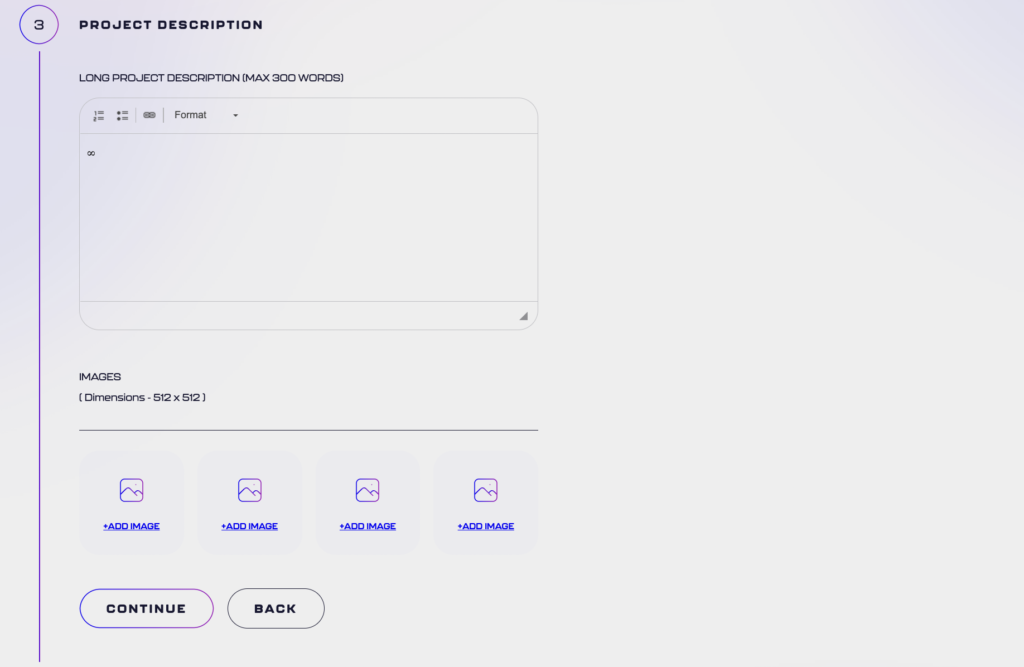
Step 3: Project Description
Fields:
Long project description – This is a longer description of you project and it will appear on your ‘Launchpad Page’.
Images – Add pictures of some of the NFTs available in the series. These will be visible on your ‘Launchpage Page’.
Press ‘Continue’ if you are confident you have filled in the information correctly.
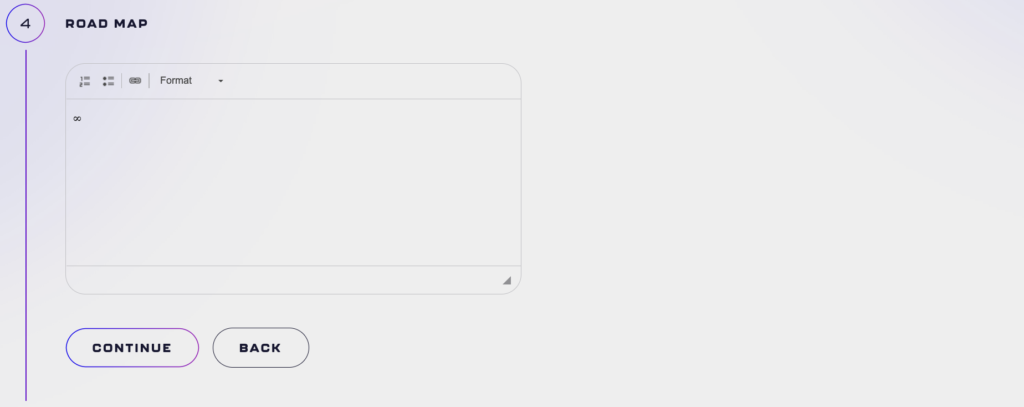
Step 4: Road Map
Fields:
Road Map – Type up your Road Map using dates (e.g. Q3 2022 – Description). This will be publicly visible on your ‘Launchpad Page’.
Press ‘Continue’ if you are confident you have filled in the information correctly.
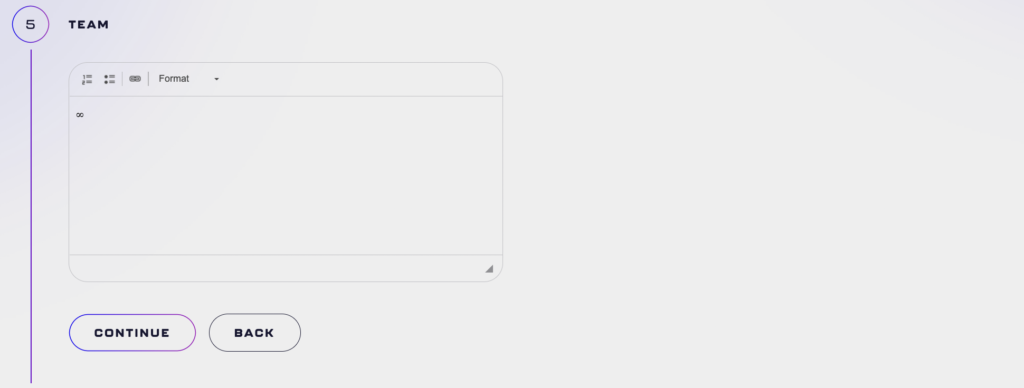
Step 5: Team
Fields:
Team – List the individuals in your team and their position or involvement.
Press ‘Continue’ if you are confident you have filled in the information correctly.
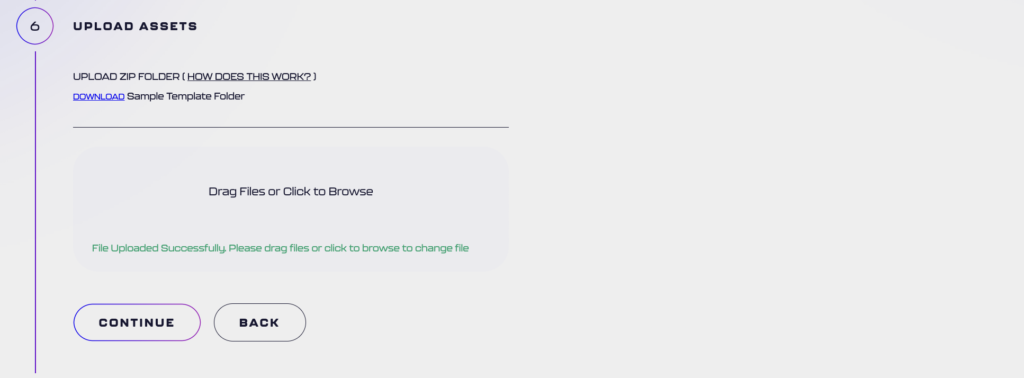
Step 6: Upload Assets
Upload a zip file with all the images and metadata of the collection. It is essential that this zip file is structured correctly and that the files are final. An example of a correct zip file can be found here: www.tinyurl.com/nftsample. For more information regarding uploading your metadata via JSON files, click here.
Press ‘Continue’ if you are confident you have completed this step correctly.
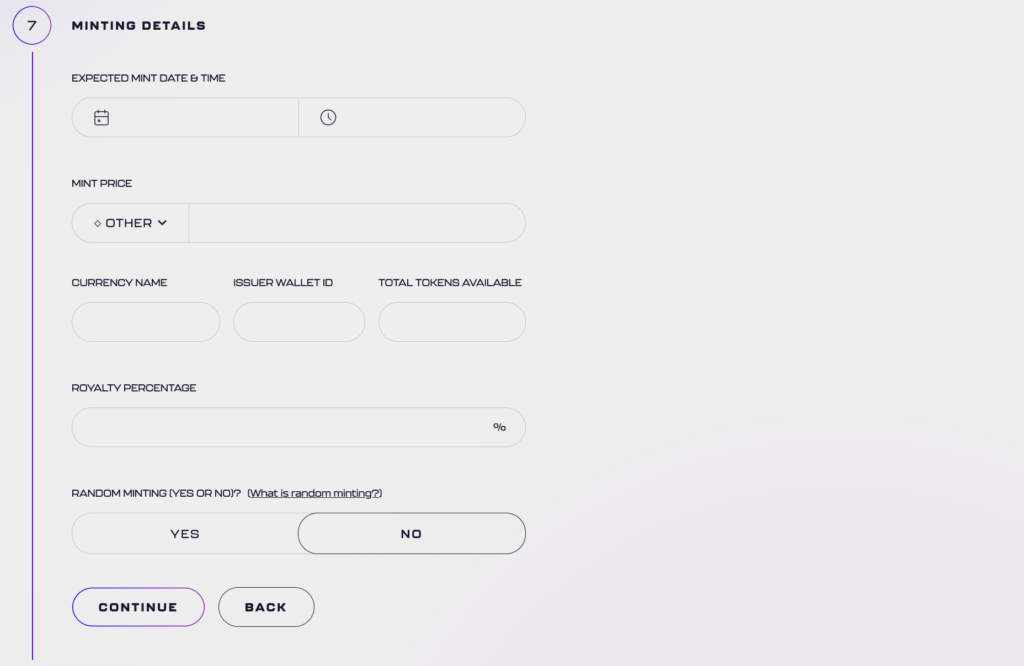
Step 7: Minting Details
Fields:
Expected Mint Date & Time – If you are applying before the marketplace has been released, you can insert a random date in the future.
Mint Price – This is the minting price per NFT. If you select ‘Other’ you must also provide:
The ‘Currency Name’ – This is the ticker of your currency (e.g. XPUNK).
IOU Issuer Wallet ID – This is the (blackholed) IOU issuer wallet address of the issuer.
Total Tokens Available – The total supply of the token.
Royalty Percentage – Place the percentage of royalties you would like to receive on secondary sales of your NFT.
Random Minting – Selected whether you want your holders to experience a random mint.
More Information About Random Minting
Random mints are facilitated in a particular manner, so project owners need to understand the specifics of how the metadata upload is structured. Once the launchpad goes online, the NFT data will be uploaded to IPFS, and the URI (the link to the IPFS directory) will be shared with the project owner. However, the URI will not yet be set on the issuer wallet or NFTs. This is done so that buyers cannot already see which NFT they mint on the ledger before signing the transaction.
During the launchpad’s active duration, the issuer wallet will temporarily point to an onXRP API which assigns the NFT, and metadata, to a newly minted NFT after the buyer signs the transactions. This is necessary to ensure that the mint is truly random. It is important for project owners to not share the IPFS & URI whilst the random mint is ongoing. The reason for this is that certain tech-savvy individuals can use this set of information to predict if they are about to mint a rare NFT or not.
Press ‘Continue’ if you are confident you have filled in the information correctly.
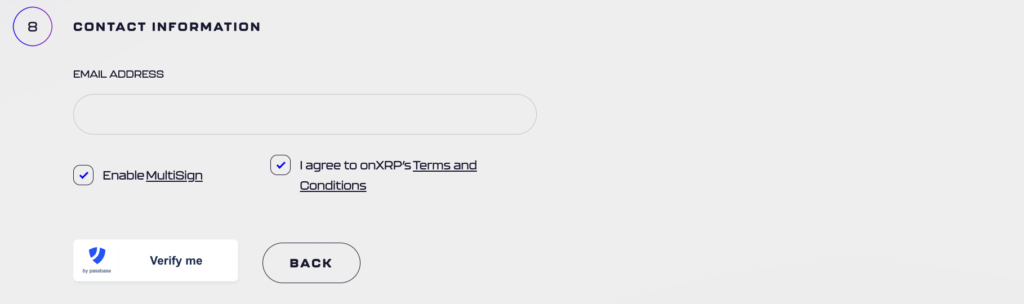
Step 8: Contact Information
Fields:
Email Address – Insert your project’s email address
Enable MultiSign – A Multisign transaction enables the onXRP backend to issue the NFTs with your issuer wallet when users purchase it. The Multisign function can always be disabled by you, but the launchpad will cease to be active whilst this functionality is turned off. If you agree with this, you may tick the box.
Please note that Multisign does not give onXRP access to your private keys.
Terms and Conditions – Read the onXRP Terms and Conditions. If you agree with them, you may tick the box.
Verify me – Complete the KYC procedure by ‘passbase’.
Press ‘Continue’ if you are confident you have filled in the information correctly.
What Now?
Once a project has been approved for launchpad, a launch date can be selected, and the project becomes visible on the ‘Upcoming Launchpad’ section. On the launch date of your project, the launchpad page will become visible and your community will be able to mint the NFTs on this page.
Our launchpad will mint your NFTs on demand, meaning that we will not pre-mint your entire set, but rather mint the NFT every time a user exchanges it for the right IOU token (or XRP/OXP if this exchange method is selected). This process protects the XRPL from getting overloaded!
If for whatever reason you need extra support for this, you may ask for assistance by opening a ticket on the onXRP discord (please consider that our moderators may not be able to help you with such technical requests, therefore ask for a marketplace representative).
Extra Information
Setting the IPFS URI
The onXRP marketplace does not call NFT metadata from individual NFTs but from the domain field of the issuer wallet. By default, the IPFS URI will be set on the issuer wallet once the entire set is minted. Until that moment, the domain field of the issuer wallet will point to an onXRP API to retrieve the metadata. This way, users will not be able to snipe NFTs whilst a random mint is active. Project owners can also request to close their launchpad before their collection is fully minted. In this situation, the following will happen:
The rest of the collection will be minted on the issuer’s wallet.
The launchpad page for the NFT project will close.
The Multisign connection will be disabled.
Projects are welcome to request specific functionalities regarding their mint, however, this is not a guarantee. We will always aim to please all projects launching on our launchpad!
Blackholing The Issuer Wallet
onXRP recommends that you do not blackhole your NFT issuer wallet before the launch of Hooks. If you blackhole your wallet before this amendment goes live, your metadata will be locked, and an extra security layer will be added to NFT holders. Blackholing your wallet prior to the release of the Hooks amendment will also prevent you from royalties post-blackholing.
Once Hooks is live, it will be possible for you to place a hook onto your issuer wallet, which will indefinitely transfer all royalties to your treasury wallet. Only then will you be able to blackhole the NFT issuer wallet. Do not hesitate to contact us if you need more information about this.
Fees
The platform derives fees from sales on the secondary market which consists of 1.5% per sale. For projects that decide to leverage the Launchpad using XRP or OXP, the platform derives dynamic fees depending on the needs of the project in question. Note that projects choosing OXP as a means of payment will receive financial benefits. However, onXRP launchpad partners will not experience any fees on their collection on the secondary marketplace.
FAQs
You must fill in this launchpad application form.
Once reviewed and accepted by the team, you and your project will be contacted by the onXRP team.
A clean wallet is a wallet to which nobody but the owner has the keys. Not only should the wallet contain a small amount of XRP (about 200 XRP should suffice), but it should also contain minimal transactional history. Most importantly, the wallet should have never issued an NFT before.
No. Multisign only enables the onXRP backend to issue the NFTs with your issuer wallet when users mint it. This omits the need to sign every transaction manually.
No. The onXRP launchpad will mint your NFTs on demand, meaning that we will not pre-mint your entire set (also known as a lazy mint), but rather mint the NFT every time a user exchanges it for XRP, OXP, or a custom IOU token.
Yes, but not under the same collection name. A project can use different currencies to mint its collection (e.g. XRP & a custom IOU token). However, when doing so, the project will have to issue two separate listings under two different collections.
onXRP uses the universal JSON metadata format. However, we also support the XLS-24d structure.
onXRP accepts, JPG, PNG, and GIF files.
To upload your NFTs and metadata correctly, you must upload a ZIP file containing a folder with both your artworks & metadata files (e.g. JSON) numbered & titled at a ratio of 1 to 1. For example, if your series is 10,000 NFTs, it must contain a folder with 10,000 NFTs named and numbered 1 to 10,000, along with another folder containing your JSON files named and numbered 1 to 10,000.
onXRP supports a maximum size of 25MB per NFT.
Yes. You can do so by redirecting to the animation_url in the metadata file and uploading it to IPFS yourself. However, this will not be shown as an MP4 on the front end on version 1 of the onXRP NFT Marketplace. We advise using a GIF of the MP4, since GIFs are supported by the UI. The GIF would then be under the "image" field in the metadata.
onXRP recommends that you do not blackhole your NFT issuer wallet before the launch of Hooks. If you blackhole your wallet before this amendment goes live, your metadata will be locked, and you may lose any of the royalties gained post-blackholing of your wallet.
Yes, however, the rest of your collection will automatically be minted to the issuer’s wallet. The launchpad page for the NFT project will subsequently close as well as the Multisign connection disabled.
We use cookies on our website to give you the most relevant experience by remembering your preferences and repeat visits. By clicking “Accept All”, you consent to the use of ALL the cookies. However, you may visit "Cookie Settings" to provide a controlled consent.
This website uses cookies to improve your experience while you navigate through the website. Out of these, the cookies that are categorized as necessary are stored on your browser as they are essential for the working of basic functionalities of the website. We also use third-party cookies that help us analyze and understand how you use this website. These cookies will be stored in your browser only with your consent. You also have the option to opt-out of these cookies. But opting out of some of these cookies may affect your browsing experience.
Necessary cookies are absolutely essential for the website to function properly. These cookies ensure basic functionalities and security features of the website, anonymously.
Cookie
Duration
Description
cookielawinfo-checkbox-analytics
11 months
This cookie is set by GDPR Cookie Consent plugin. The cookie is used to store the user consent for the cookies in the category "Analytics".
cookielawinfo-checkbox-functional
11 months
The cookie is set by GDPR cookie consent to record the user consent for the cookies in the category "Functional".
cookielawinfo-checkbox-necessary
11 months
This cookie is set by GDPR Cookie Consent plugin. The cookies is used to store the user consent for the cookies in the category "Necessary".
cookielawinfo-checkbox-others
11 months
This cookie is set by GDPR Cookie Consent plugin. The cookie is used to store the user consent for the cookies in the category "Other.
cookielawinfo-checkbox-performance
11 months
This cookie is set by GDPR Cookie Consent plugin. The cookie is used to store the user consent for the cookies in the category "Performance".
viewed_cookie_policy
11 months
The cookie is set by the GDPR Cookie Consent plugin and is used to store whether or not user has consented to the use of cookies. It does not store any personal data.
Functional cookies help to perform certain functionalities like sharing the content of the website on social media platforms, collect feedbacks, and other third-party features.
Performance cookies are used to understand and analyze the key performance indexes of the website which helps in delivering a better user experience for the visitors.
Analytical cookies are used to understand how visitors interact with the website. These cookies help provide information on metrics the number of visitors, bounce rate, traffic source, etc.
Advertisement cookies are used to provide visitors with relevant ads and marketing campaigns. These cookies track visitors across websites and collect information to provide customized ads.